LTTA Ideas!

Saturday, October 21, 2006

Musical Patterns


After introducing patterns to the students, we explored patterns in music. We listened to music and discussed the patterns we hear repeated (i.e. chorus, beat, phrases...). Using numerous instruments from our Fine Arts room, students explored the instruments to see what sounds they made. Next, students were told that they needed to create a pattern, using their musical instruments, that a) repeated itself 3 times and b) included all members of their group. After 20 minutes of exploring and practicing, students were then given chart paper and a marker. Their next task was to "name" their pattern. They were to give each instrument a letter (i.e. drum - A, cymbals - B...) and write their pattern on chart paper. Students then demonstrated their "musical pattern" for the rest of the class, whose job it was to guess the pattern. The students really enjoyed this and were able to connect patterning to an often overlooked part of their lives!

Tuesday, May 16, 2006

What Do Cartoons Have To Do With School?


I have found a fun and interesting way to teach story writing, dialogue and a little bit about insects through the creation of cartoons!

CAUTION: This is a work in progress!

FACIAL EXPRESSION
  • we explored how our faces can show emotion - we focused on our eyebrows, mouth and eyes
  • we played a little game of "Facial Charades" to really get us into it!
  • using MS Word, I created a table with 36 boxes, each of which we filled with an expression and a description
  • I used the handout from Cartoon Connections for ideas!
  • we next moved into speech bubbles and symbols

INSECTS AND EXPRESSION

  • as we were learning about insects in science, we learned about how to draw a spider
  • we practiced putting different facial expressions on it and talked about what it could be saying
  • students then created a single panel cartoon using a spider and a speech bubble
  • it was fun to teach about the parts of a spider through drawing
  • we then did the same for other insects

CONVERSATION

  • next we talked about dialogue
  • we looked at examples of cartoons and talked about what we noticed
  • we talked about how important it is for one character to talk and another character to respond
  • students were put into pairs with four large blank faces and speech bubbles
  • students came up with a setting and dialogue for their characters and drew expressions to go with the dialogue
  • this was great and the kids kind of wrote a "mini" tory without realizing it!

Thursday, May 04, 2006

Insects, Insects EVERYWHERE!


Take a trip with us as we learn about the creepy crawly world of insects!


BODY PARTS

Part 1:
  • students rotate through various pictures of insects and compare them
  • a class discussion leads to a discussion on similarities and differences between insects
  • Students note that all insects have: 3 body parts and 6 legs!!

Part 2:

  • To further student learning about "What is an insect", we used the website "Let's Talk About Insects" and enjoyed the narration and animation!

Part 3:

  • What better way to reinforce learning than through dance and music!
  • We danced and sang the following song repeteadly (we sang as monsters, people crying, Opera singers, country stars...)

(To the tune of "Head and Shoulders, Knees and Toes")

Head and thorax, ab-do-men

Ab-do-men, ab-do-men

Head and thorax, ab-do-men

Antennae, wings and stingers too!

  • After much singing and smiling, the students made 3-D replicas of insects with plastercine and labeled each body part

Part 4: Butterflies and Life Cycles

It was fun to watch our 10 caterpillars go through their lifecycle and emerge as a beautiful butterfly.

  • After reading and looking at various websites and books, we discussed the lifecycle of a butterfly.
  • to help learn the stages, we acted out each stage according to how it looks and must feel
  • the kids wrote poetry about butterflies and their lifecycle
  • students read books and looked at pictures to learn more about a butterflies body and wings
  • students then created a large, paper mache version of a butterfly

Thursday, March 16, 2006

Explore Atlantic Canada!


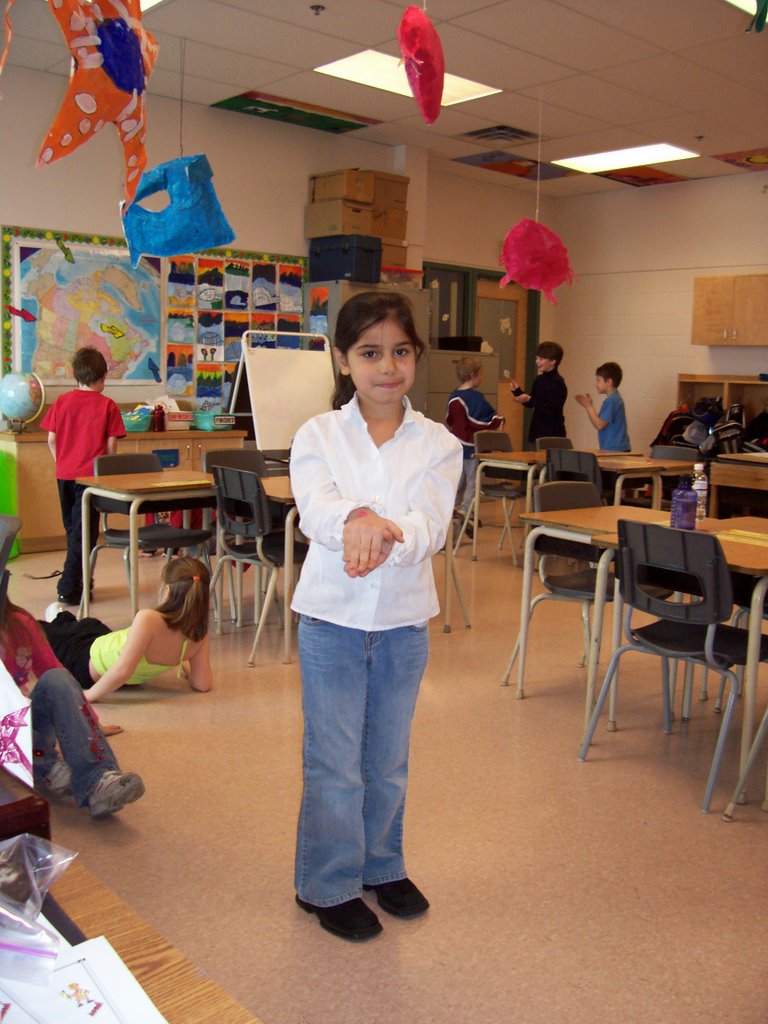
As part of our Social Studies curriculum, we have been looking closely at Atlantic Canada and the landscape. Here is how I approached teaching the landscape through the arts....

Lesson 1 : Introduction
Discussion/mapping of where Atlantic Canada. Students will do a KWL chart.

Lesson 2: First Impressions
Teacher will print numerous pictures of Atlantic Canada.
Students walk around and observe pics. Students choose favorite pic. and stand by it, therefore, creating their work group. Using a sharpie and paper, students analyze the pic., writing down nouns and adjectives to describe what they see
Circle 5 nouns they feel most represent Atlantic Canada. As class, teacher lists nouns on chart paper.

Lesson 3: Inquiry into Atlantic Canada
Students rejoin group and ask questions based on their pictures
As a class compile questions and keep posted for reference throughout unit.

Lesson 4: Oil Pastel
Teach new medium: Oil pastels
Students are given B & W copy of their pic. and use pastels to color it in
Add any new nouns they noticed while doing this


Lesson 5: Descriptive Writing
Teach similes and do many examples
Refer back to list of compiled nouns
Using google, students search for Atlantic Canada images and paste into PowerPoint
Write a simile to describe the image
Discuss role of font, balance, complimentary colors and animation
Record students reading their simile
Refer back to original pic. and write similes about the landscape

Lesson 6: The Bluenose Schooner and other boats

As a correlation to our science unit, "Boats and Buoyancy" we started to look at various types of boats, and the construction of boats. Students inquired about boats using library books, videos and the internet. Our conversations led us into talking about the Bluenose Schooner - and it's importance to Atlantic Canada. It led to an interesting discussion about the dime and the location of the Bluenose on it.

After learning about the various parts of a boat, students used charcoal pencils and a grid to redraw the Bluenose. Emphasis was put into the actual design of the schooner, and art techniques of shading.

Transportation of goods by water and land were discussed and students role played the movement of goods by different forms of transportation.

Lesson 7: The MicMac and Acadia

We brainstormed about different types of boats, and one that was discussed with the canoe. This led us into a look into how the Micmac used birchbark canoes to travel. Students used butcher tape to make a canoe replica. We talked about how the Micmac traveled down the St. Lawrence River and eventually encountered early settlers. Students renacted these first encounters.

Lesson 8: Early settlers and quilting through fractions

Recreation time for early settlers were discussed and it led into the study of quilting and quilting bees. Students had the oppotunity to look at quilts and identify patterns and designs. This led us into a discussion on fractions. Students later created fractional quilt squares using halves, thirds and quarters!

Lesson 9: Atlantic Puffin

The students were excited to learn about the Atlantic Puffin. We read books about the Puffin, and listened to the Puffin on the internet. We looked at the work of George Seurat, who is a Pointilism artist. We talked about how we can convery shadow with dots. Students were given an outline of a Puffin and needed to use a Sharpie to shade in the Puffin. they turned out to be beautiful!

Lesson 10: Soundscape

This was really fun and involved a lot of creativity and collaboration for the students. We reviewed everything we had learned about the landscape of Atlantic Canada - rocks, fog horns, water, plants... We talked about what sounds they thought these features we would make (i.e. a rock may make a "plop") and then we discussed which of the features would be "loud" sounds and which would be "soft" sounds. I put a variety of instruments around the classroom and had students explore for at least a noisy 25 minutes with these instruments. We discussed "loud" and "soft" instruments. Students were then encouraged to become composers, creating a 20sec. soundscape about the landscape of Atlantic Canada. We had discussed how to create a clear beginning, middle and end - as well as having flow to their song. A truly fun and enriching experience!

Lesson 10: Conclusion

We read and learned about the art of Ted Harrison. We discussed his use of lines and colors and simplistic detail. We talked about what things would represent Atlantic Canada.

As a final conclusion to our unit, we wrote a song to the tune of "Twinkle, Twinkle Little Star" entitled: "Lobster, Lobster on a Dish". The whole class wrote the first verse together, and then small groups wrote the additional verses. We taped our song and played it for the school. Here are the great lyrics!

Lobster, lobster on a dish,
I wonder if you’re a fish?

Under the sea so deep and blue,
And it looks like you are new,

Lighthouse, lighthouse shining bright,
Guiding fishermen through the night!

Beluga, White tail, Orca whales,
Dancing with their giant tails.

Dairy, dairy, dairy cows,
Give me some milk I need it now!

There are lots of rocks out here,
Crashing waves are coming near.

Market, market sells so fast,
We have really good food at last!

The water is blue just like you,
Whales swim and they are blue.

Schooners, schooner floating away,
Rocking back and forth each day!

Lobster, lobster on a dish,
I wonder if you’re a FISH!
!

Rock-A My Fingers!


I use this game as a fun way to review basic facts!

Discuss how students can move (we moved like animals and objects you would find in Atlantic Canada - ie. boat, seaweed, lobster...). Play music of your choice (again, you can tie it into a theme - we played "Great Big Sea" to correlate to our study on Atlantic Canada).

Students move as their object around the room while the music is playing, when it stops playing, they choose a person next to them and the teacher yells out basic fact sentences. The partners use their voices/fingers to see who is faster.

A really fun game!

Dancing Area and Perimeter

Finding Area and Perimeter:
This was an exciting lesson taken from the LTTA website.
Prior to the lesson, I used masking tape to make large geometric shapes on the floors.

Prior to talking about AREA and PERIMETER, we talked about what estimating and good estimating looked like. Students were given a partner and asked to decide who was the apple and who was the banana. They were to stand apart from each other and estimate how many crab steps, bear steps....it would take to get to their partner.
Students brought to the area and we talked about what an edge is.

I introduced the sound of a drum beating, and explained that they had to move in anyway they wanted, to the beat of the drum. When the drum stopped, they were to find a shape and stand on the edge of it. We did this a few times with varying drum beats.

Next, I introduced the sound of a triangle, and explained that when they heard this sound, they were to tip-toe around the edge of a shape. We did this a few times at varying lengths and beats.

Lastly, a shaker was introduced and they were told to try to cover the shape with their bodies when they heard the shaker. We spent about 20 minutes doing different arrangements of these 3 instruments.

We gathered around the rectangle and I told them that I was going to find the distance AROUND the shape by walking heal to toe with my feet. They made estimates, and then I walked around. We discussed how this is called PERIMETER and how my measuring tool was my feet. We talked about how somebody elses measurement might be different if they had smaller feet and what other measuring tools we could use. Students were then sent with their math scribblers to estimate, measure and record the various perimeters of the shapes.

After discussion, I asked students if they could think of a way to cover a shape. They came up with many ideas, such as using people sitting, standing, laying... We found the area of many shapes and discussed what AREA meant.

At the time, the students were working on stuffed 3D sea creatures (try to say that 3 times fast!). Before they could stuff their animal, they had to find the perimeter and area of the shape with a measureing tool of their choice!

This was a fun and effective way to teach students about area and perimeter!

Tuesday, February 14, 2006

Canada's Arctic Comes Alive!


Integrated Subjects: Social Studies, Art (sculpture), Language Arts

Overview:
As part of our conclusion on the Arctic, students chose an Arctic animal that they were interested in learning more about. We had a discussion and came up with a list of questions they may want to answer when researching about their animal. After much sampling, students were able to use books to research their animals. They then took their information and put them into good sentences that included questions, exciting statements and "boring" statements (all of which is part of our writing/ reading program based on Smart Start by Joanne Moore).

To integrate technology, students were introduced to Microsoft Powerpoint, in which they created a slide with their typed information, a picture taken from the internet and some basic animation and design. We compiled our writing into a slideshow and I also printed the slides and created a class book for students to read!

One of the major focuses of studying their animal was to view and learn about its appearance. We used gum tape (which is used by butchers) to create 3D representations of our animals. We later painted with Tempra paint and added greater deatail to make our animals more realistic!

Wednesday, February 08, 2006

What Does Picasso Have to Do With Math?


Integrated Subjects (thus far!): Math, Art, Computers

Overview: Continuing on with symmetry, we read an excellent book called "When Pigasso met Mootise" in which we read about the art and life of Picasso and Matisse. As we read the book, we discussed each page, and compared the work of Picasso and Matisse, which we constrasted on chart paper. My goal was to have somebody say that Picasso's work was really asymmetrical - and EUREKA! somebody did say it! This led us into a review of symmetry and then into a discussion about what abstract art is. We came to the conclusion, that like Picasso's pieces, abstract art was colorful and did not look "real". To help create abstract art, we played "Musical Art" (thanks Sarah), which is similar to musical chairs, but in this case, when the music stopped, you sat down and drew lines on somebody elses piece of paper! The kids really enjoyed this and we were able to create some really amazing abstract pieces of art. For further integration, the kids wrote about Picasso and what they had learned:

Sample Work:

Did you know that Picasso did abstract art? Picasso was born 125 years ago! Picasso is dead. Picasso lived in Spain! Spain is a very hot country. Picasso drew abstract things!

By: Miles


#2

Hi! My name is Danny. I'll be telling you about Picasso and Matisse. Picasso was a world famous artist. He lived until 1881. That's 125 years ago! Did you know that Picasso drew on his wall when he was a kid with a sharp object? Picasso lived in Spain. That's where he drew on the wall. When he grew up he moved to France, that's where Picasso met Matisse. Picasso moved to France because everybody was trying to buy his art.

By: Dan


The next step in our journey with Picasso, was to study his masterpiece entitled, "Three Musicians". We had a discussion about what we saw in the art, and many students started to suggest the different shapes we see in his work (rectangles, triangles, squares...). We did an overview of the different shapes they had learned in grade 1, and did an in-class scavenger hunt to list all the different shapes we could see. We went back to Picasso's work and once again reviewed the shapes. Students were then "set free" to create their own rendition of the "Three Musicians".

You could also teach geometric art through the work of Hilary Helfant

Sunday, February 05, 2006

Symmetry (Adapted From LTTA Dancing Geometry)


Integrated Subjects: Math, Language Arts, Dance, Art, Computers/ Digital Technology

Overview:
This was an exciting way to introduce many math concepts through dance. I used the Dancing Geometry lesson from LTTA and was thrilled at the results. We started by listening to various types of music (Spanish, Folk, Classical...) and discussed the feelings that each one gave us. We discussed the instruments we heard and what culture used each. We read and looked at pictures of different types of dance in diffe

rent cultures (Jazz, Swing, African, North American, Indian, Japannese...) and then we tried moving our bodies to the different types of music. We then explored how we can move forward, backwards, sideways to the music and then explored how we can move these directions at various levels (low, medium, high).

We then discussed ways we can pose - beside, infront, behind, uner and over. Students were placed in pairs to create these different poses with their partner.

The next day, students were introduced to the terms symmetrical and asymmetrical. We watched the brief clip on the LTTA page and then I posed in different poses until they could identify it as symmetrial or asymmetrical. Students were encouraged to make individual symmetry poses and later made symmetry poses with a partner. We presented our poses to our Kindergarten reading buddies and then tried to teach our buddies the different poses we had learned.

To reinforce the concept of symmetry, I taught students how to use a digitial camera and explored what makes a good picture. Student pairs then took the digital cameras throughout the school (scarey!) and took photographs of symmetrical and asymmetrical things they could find. Later, the pictures were printed and used as part of their writing entry.


After printing the pictures, students worked with their partner to reflect on their learning. They were to explain their poses and everything they knew about symmetry. I typed up their entries and placed them with their pictures.

In computers, we had been working in Microsoft Publisher and learning how to insert autoshapes. Students were given the challenge to create a symmetrical and asymmetrical design using autoshapes! The results really showed their understanding of symmetrical and asymmetrical shapes!
Sample write-up

Do you know what symmetrical is? It means that your whole body is the same on both sides. In the first picture, we are doing a symmetrical pose. It is symmetrical because we are doing the same thing. In the second picture we are doing an asymmetrical pose. It is asymmetrical because we're not doing the same thing. In the third picture, we are doing an asymmetrical pose. It is asymmetrical because if you cut us in half, it wouldn't be the same on each side.

By: William and partner

Magnetic Pantomine

Mighty Magnets!


Integrated Subjects: Science, Language Arts, Drama/Movement , Computers

Overview:
In science, my students were learning about magnets, more specifically, the different types of magnets. After exploring with magnets, students were given different types of magnets and were asked to think of a name that would suite each type. We were able to categorize our magnets into 4 groups: Horseshoe Magnets, Ring Magnets, Bar Magnets and Fun Magnets. Students were then asked to explore how they can represent each magnet using their bodies. I took digital photo's of each child posing in the various magnet positions and displayed them on the bulletin board. We continued our discussion into compiling a list about everything we know about magnets so far. I explained to students that were going to make found poems and read them numerous examples. After discussing what a found poem sounded like, students were then sent to write their poems. After some quick editing, students typed up their poems on the laptops and shared them with their peers and their reading buddies. The magnet poems and poses were then displayed together on the bulletin board.


Sample Work:

Magnets
Round,
Fun,
Long, Sticky,
Silly, Stick

To
Metal! (By: Jeevan)


I Don't Stick

I don't stick to

You,

and I Don't sitck

To the Wall,

But I do stick

To the

Whiteboard.

By: Jaydon


Inukshuks

Integrated Subjects: Social Studies, Math, Art

Overview:
As our Inuit unit continued, we discussed the barren land and how they thought the Inuit would know where to go. We discussed how we used signs and maps to help us find our way around and related it to how the Inuit used Inukshuks as signs. After reading "The Lonely Inukshuk" and watching a video on Inukshuks, students designed their own Inukshuks out of rocks. Students needed to think about the placement of the legs and the direction of the arms, as every part of the design told a specific direction. After learning about Inukshuks, we studied "The Snail" by Henri Matisse. This led us into a discussion of what quadrilaterals are and an "I Spy" game within the classroom. Students created their own rendition of Matisses work using only quadrilaterals and then they furthered this skill into making an Inukshuk out of colored construction paper. The results were creative and inspiring!

Inuit Soapstone


Integrated Subjets: Social Studies, Visual Arts (Sculpture)

Overview:
During our study on the Inuit way of life, my grade 2 class looked at the traditional art forms used by the Inuit. We read books and looked at many pictures to learn about soap stone carving. After much observation and analysis, the students were given 2 bars of soap and a plastic knife to carve their own soapstone images. Later, a parent voluneer and artist, brought in a rough block of soapstone. This allowed the students to feel real soapstone and see how brittle it is. Students then worked with the artist to plan, carve, sand and polish the soapstone into a beautiful polar bear!

Inuit Warrior Masks


Integrated Subjects: Social Studies, Math, Visual Arts

Overview:
While discussing the Inuit, my grade 2 class started a discussion about other Native American groups. We discussed what Native American meant and the traditons and customs of different groups. This led us into a discussion about masks. After looking at various Native American masks in books and on the internet, we looked at the symbolism behind the pictures and colors. We discussed how many of the masks were symmetrical in design. Students were then given the opportunity to create a 3D mask using oil pastels, construction paper and manilla tag. After making their masks, students shared with their peers the design, symbols and colors used in the creation of their mask.

(After completing this activity, I found this excellent resource about masks!)